
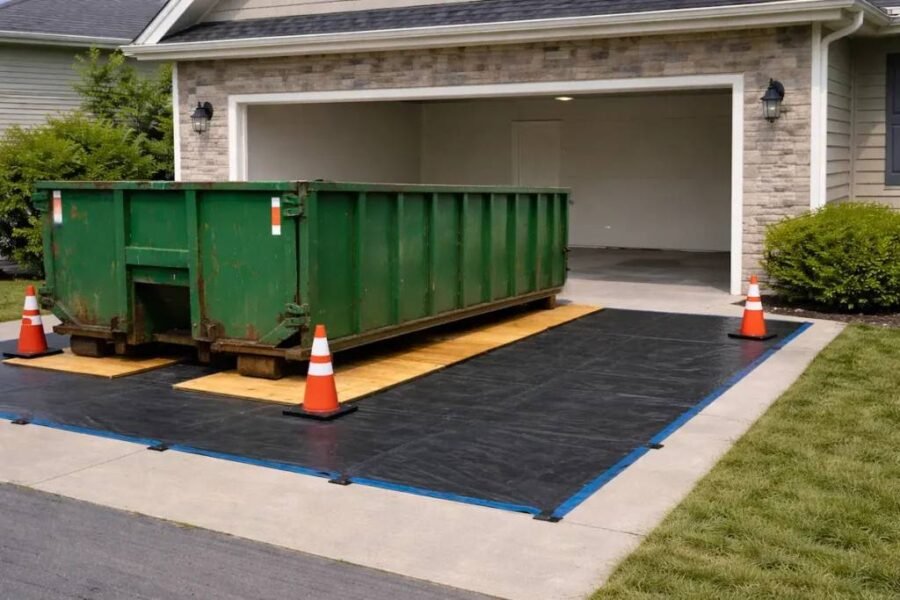
A roll-off container makes cleanup faster, but where you place it can make or break the experience. Scrapes, stains, cracked surfaces, and sunken pavers are common headaches that usually come from one thing: the container was set down in the wrong spot or without the right protection. Before you schedule your roll-off dumpster rental, it helps to understand how driveway and pavement materials behave under heavy loads, especially when they are hot, wet, new, or already worn.
This guide walks through smart placement choices for asphalt, concrete, and pavers, plus practical ways to protect each surface. It is written for homeowners, contractors, and anyone managing a site where the pavement matters.
Why placement matters more than people think
A roll-off container is heavy even before you load it. Add demo debris, roofing, drywall, lumber, or soil and the total weight can climb quickly. That weight is carried through a small number of contact points, typically the container’s steel wheels and rails. Those contact points can:
- Leave gouges and scratches
- Cause hot asphalt to rut
- Trigger hairline cracks in weak concrete
- Shift or sink pavers by concentrating load
- Create stains from rust, dirt, and debris moisture
None of this means you should avoid a dumpster. It just means placement should be treated like a quick plan, not a last-second decision.
Start with the simplest question: “Where do we want the work to happen?”
The best spot is usually the spot that reduces carrying distance and keeps traffic flowing safely. Think about:
- Where debris is generated (demo area, roofing drop zone, remodel entry)
- How crews or homeowners will walk materials to the container
- How wheelbarrows will roll
- Whether you need room for doors or a walk path to remain open
- How pickup will work when the container is full
If you put the container in a “perfectly safe” place that forces everyone to carry debris farther, you increase the odds of spills, back strain, and debris ending up scattered around the site. The goal is balanced: protect the surface and make the job easier.
General placement rules that apply everywhere
Before we get surface-specific, these fundamentals prevent most placement problems:
1) Pick a level location
A container that leans can be harder to load and may shift the load unevenly. On steep slopes, doors can swing unexpectedly and rolling debris becomes a risk.
2) Leave clearance for delivery and pickup
You need room for the truck to approach, back in, and tilt the bed to set the container down. A good rule is to ensure:
- Clear path width for the truck
- Enough vertical clearance for the raised bed during drop-off and pickup
- No low branches or wires near the approach or the placement spot
3) Avoid soft edges and hidden voids
Driveway edges, trenches, recently backfilled areas, septic covers, and utility lids are common “surprises.” Heavy point loads near edges can cause cracking and collapse.
4) Keep the container accessible all rental
A container can become “trapped” by parked vehicles, material deliveries, or fencing changes. Plan a no-parking zone for the full rental period.
5) Protect more area than you think you need
Damage often happens from the truck’s tires during placement, not just from the container sitting still. Protect the travel path if it crosses a fragile surface.
Protecting asphalt: strong, flexible, and easily scarred
Asphalt is forgiving in some ways and delicate in others. It is flexible, which helps it handle vehicle traffic. But it softens in heat and can deform under concentrated loads.
Asphalt risks to watch for
- Ruts and depressions during hot weather
- Gouges from steel rails or wheels
- Surface tears if the container shifts or is dragged even slightly
- Staining from oils, dirt, and rust, especially on newer asphalt
Asphalt protection best practices
- Use load-spreading pads The goal is to distribute the container’s weight over a larger footprint. Common options include:
- Thick plywood sheets (heavier is better)
- 2×10 or 2×12 lumber laid flat as runners
- Composite mats or purpose-built dumpster pads
- Place protection where the container’s wheels or rails will land, and extend beyond those points.
- Be extra cautious in summer If your asphalt is hot enough to feel soft underfoot, it is more likely to rut. Consider placing the container in a shaded area, or on a different surface if available.
- Avoid placing on fresh asphalt New asphalt needs time to cure. If the driveway is recent, treat it as fragile even if it looks solid.
- Keep the area clean under and around the container Fine grit and small stones can grind into asphalt under pressure. A quick sweep before placement helps.
A quick asphalt checklist
- Is it hot outside, and does the driveway get direct sun?
- Is the asphalt new or recently patched?
- Can you use plywood or boards at all contact points?
- Is there an alternative location like a gravel pad or compacted area?
Protecting concrete: durable, but not invincible
Concrete can handle heavy loads, but it does not like point loads, existing cracks, or weak sub-base support. Concrete also varies a lot. A thick commercial slab behaves differently than a residential driveway apron.
Concrete risks to watch for
- Cracking if the slab is thin, old, or already cracked
- Chipping and spalling at edges and joints
- Pressure damage near corners, steps, and transitions
- Stains from rust, dirt, or wet debris
Concrete protection best practices
- Avoid slab edges and joints Concrete is often weakest at:
- The outer edges of a driveway
- Control joints and expansion joints
- Areas where the slab changes thickness
- Keep the container set back from edges when possible, and avoid placing wheels directly on joints.
- Use wood runners or plywood Even on concrete, protection is worth it. It reduces the chance of chips and helps prevent staining. For heavier loads, runners can be better than thin sheets because they provide a stable “beam” effect.
- Mind the slope and drainage Concrete slopes are designed to move water away from buildings. Placing a container can block drainage and cause puddles. Standing water near slabs can worsen freeze-thaw damage in colder climates.
- Watch for decorative finishes Broom finish is common and forgiving. Stamped, dyed, or sealed concrete can be more sensitive to stains and scuffs. If the finish matters, treat it like a premium surface and protect it accordingly.
A quick concrete checklist
- Are there existing cracks, or is the slab thin?
- Are there decorative finishes you want to preserve?
- Can the container be placed away from edges and joints?
- Do you have boards or plywood ready to reduce point loading?
Protecting pavers: great looking, most vulnerable to settling
Pavers are strong individually, but the system depends on the base. Concentrated weight can shift the base, compress the sand layer, or pop pavers out of alignment.
Paver risks to watch for
- Settling that creates low spots
- Shifting that breaks pattern alignment
- Edge restraint failure if the container is near borders
- Surface scuffing on textured or tumbled pavers
Paver protection best practices
- Avoid placing directly on pavers if you can If there is a driveway extension, gravel pad, or compacted area, it is often a better choice. Pavers are expensive to reset properly.
- If you must place on pavers, spread the load aggressively Thin plywood alone may not be enough. Consider:
- Multiple layers of thick plywood
- Full-length lumber runners under the rails
- Mats designed for heavy equipment
- The goal is to distribute weight across many pavers, not a small cluster.
- Avoid the edges Paver edges rely on restraints. Heavy loads near the edge can cause lateral movement. Place the container toward the center of a paver field if placement on pavers is unavoidable.
- Keep pavers clean before drop-off Small stones and grit trapped under boards can imprint into the surface texture under pressure.
A quick paver checklist
- Can you choose a non-paver location?
- Is the base known to be stable, or has it settled in the past?
- Do you have heavy-duty mats or layered wood protection?
- Is the container staying for a long time, increasing settling risk?
What to put under the container: practical options
Here are common protection methods, from simple to more robust:
Plywood sheets
- Pros: Easy to find, fast to deploy
- Cons: Can flex if too thin, can delaminate when wet
- Tip: Use thicker sheets and place them where the rails and wheels will actually contact.
Lumber runners (2×10 or 2×12)
- Pros: Strong, spreads load well, less flex than thin sheets
- Cons: Needs proper placement and enough length
- Tip: Align runners with rail contact points so the container lands squarely.
Composite mats or equipment pads
- Pros: Designed for heavy loads, good grip, reusable
- Cons: Not everyone has them on hand
- Tip: Great choice for pavers and hot asphalt.
“Do not use” shortcuts
- Thin cardboard, small scraps of wood, or a couple of narrow planks usually do not help much. Uneven protection can create pressure points and cause more damage than no protection.
Placement planning for contractors: keep production moving
On job sites, placement decisions impact productivity. A few contractor-friendly tips:
- Position the door toward the work so crews can walk in bulky debris instead of tossing it over the top.
- Leave a clear lane for pickup even when the site gets busy. If the container is blocked, pickup delays can ripple into schedule problems.
- Plan for swaps if the project is high volume. A tight spot that works for one delivery might not work well for repeated swaps.
- Keep it visible but not in the way. If a container is tucked too far back, people create “mini dump piles” closer to the work and forget to move them later.
Weather and timing: the overlooked factor
Surface damage is more likely when conditions are extreme.
- Heat: Asphalt softens, and heavy point loads rut faster.
- Rain: Water adds weight to debris and can soften sub-base under pavers or edges.
- Freeze-thaw: Water under slabs and pavers can expand and shift surfaces.
If you can schedule placement during moderate conditions, great. If not, compensate with better load spreading and smarter placement.
Final walk-through: a simple placement checklist
Before the truck arrives, take five minutes and confirm:
- The placement spot is level and clear.
- There is overhead clearance for the delivery truck’s tilt.
- The approach path is free of parked vehicles and obstacles.
- The surface type is identified (asphalt, concrete, pavers) and protected appropriately.
- Protection is laid out where rails and wheels will land.
- The container will not block access, walkways, or emergency routes.
- Pickup access will still be open once the project gets busy.
Wrap-up: protect the surface, protect the schedule
Most driveway and pavement damage is avoidable with basic planning and the right protection under the contact points. Asphalt needs extra care in heat, concrete needs respect for edges and joints, and pavers need the most load spreading to prevent settling and shifting.
If you treat placement like a small part of the project plan instead of an afterthought, you get the best of both worlds: faster cleanup and a surface that still looks the way it should when the work is done.