Just imagine, whenever you want to savour crusty bread that is second to none in its taste. Homemade bread is always better than store-bought. You don’t have to worry about whether healthy ingredients are used, without any emulsifiers or preservatives. You simply know what you are eating, and bread baked in the oven is always delicious, no matter what time of day it is. Wondering what baking bread in the oven looks like? In this article, we will give you some top tips on how to do it. Find out more!
Recommended bread recipe
It’s time for you to learn a tried-and-tested recipe for delicious bread that you’ll love the scent of from the very first moment. Baking this bread will be quick and easy, so you won’t have any difficulties. You can be sure that the bread will be superb, and this recipe will forever be etched in your heart and on the first page of your recipe book. Let’s start the process of baking!
First step – gather all the ingredients
The list is not extensive, as you only need four main ingredients. Most of them you will certainly find in your kitchen cupboard, so a long journey to the supermarket will not be indispensable. So, let’s see what you need to bake bread in the oven:
- Bread flour (600 g) – it is particularly recommended because it gives a more crunchy crust and a pronounced flavour.
- Warm water (1 2/3 cups) – the water should be at room temperature (it must not be hot, as well as icy). Colder water gives the dough a better flavour as it takes longer to rise. The temperature that is considered suitable equals 70 °F – 21 °C.
- Instant yeast (2 1/4 teaspoons) – is the most important ingredient that can not be missing.
- Salt (15 g) – salt is also a crucial ingredient. We highly recommend using coarse salt, for example sea salt, and your bread will be absolutely delightful.
If you want, you can add some herbs or spices, such as rosemary, garlic, onion, dill, chopped nuts, dried fruits, pumpkin, and sunflower seeds. Here you have a completely free hand when it comes to choosing toppings. Select the ones you like the best and those that will make your bread taste even more mouth-watering.
Second step – combine the ingredients
It will take you some time to bring the dough together. It is best to use your hands, then you will be sure all the flour is moistened. The final dough should be sticky – a sign that you have done a great job. Then the dough needs to rise. Cover it using a thin cloth and leave the dough at room temperature for at least 3 hours. If you want to achieve a better flavour, leave the dough to rest for 12 hours. The longer, the better – the main rule for obtaining the best bread.
Third step – shape the loaves
You are advised to shape at least two loaves because one loaf of bread will be too big. Then grease a baking tray with oil and place the loaves side by side. Score the loaves with a sharp knife.
Fourth step – set the oven temperature
The temperature needs to be very high for our loaves to bake well. Set the oven to 475 °F (ca. 246 °C) and wait for it to heat up. Into the oven! Thanks to the high temperature, you will immediately see the changes taking place.
Fifth step – bread baking
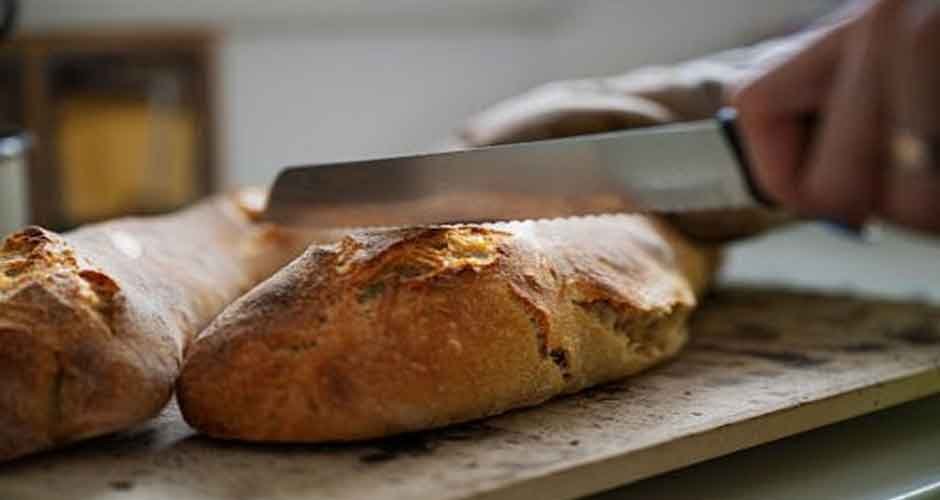
Have a closer look. The dough should start to rise, spill over to the sides, and then you’ll notice that the crust is getting golden brown. This is a sign that everything is going your way, and you will soon be tasting your baked goods. It shouldn’t take more than 25 minutes to bake. Once the loaves are ready, usually if you tap the baking tray it will give out an empty sound. So let’s check if you can bring them out! Be aware that the loaves have to cool off, before you slice your bread and savour this amazing taste. The only thing that you can do now is just smell.
Sixth step – enjoy your homemade bread
It’s everything! You did a great job, and now it is time for tasting your bread. Savour this unique flavour, invite your friends and spoil them with this exceptional bread. It is worth adding that fresh bread tastes best with butter, which melts wonderfully on the slices. Give it a go! Bread from the oven does not need any additions, bet on simplicity, which you will surely delight in!
Bread oven – we owe this taste to him!
Let’s not hide the fact that it is the bread oven that makes the bread fluffy, always fresh, with a crispy crust, tasty and its smell wafts throughout the entire house. This is a traditional, wood-fired oven. It is perfectly suited for domestic purposes. What’s more, it is made of robust, refractory materials, which results in its long-term durability and reliability. Thanks to it, you will always be able to enjoy fresh bread for breakfast, serve it to your friends or during gatherings with your closest family. No doubt everyone will ask you for the recipe. One purchase, and you can save for many years to come because you won’t be visiting the bakery again. You will have your own bakery at home, which will be the best in the neighbourhood.