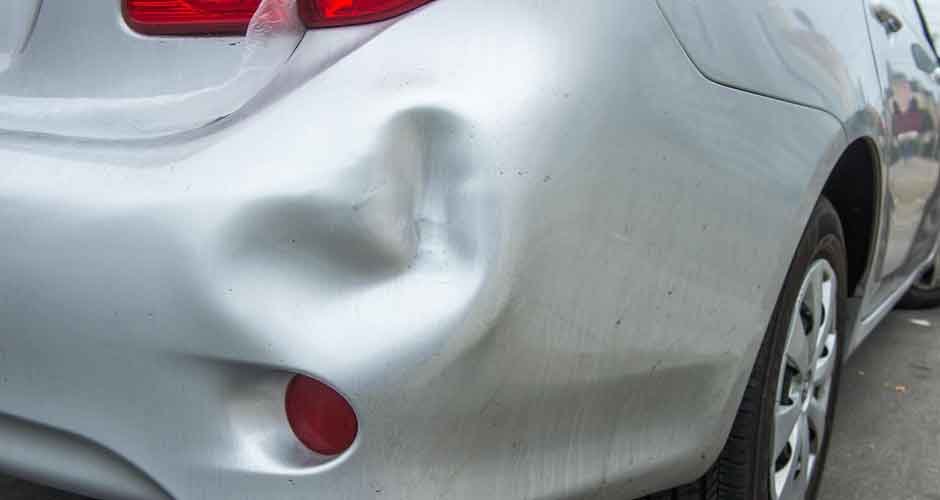
Dents on your car can be a real eyesore. From a minor fender bender, a careless shopping cart, or a hailstorm, those unsightly dings can frustrate you. But fear not! Paintless Dent Repair (PDR) is a highly effective technique that can restore your car’s pristine appearance without the need for expensive bodywork. Whether you’re a seasoned DIY enthusiast or a novice looking to save money on auto dent repair, these tips will help you master the art of PDR.
Paintless Dent Repair (PDR) is a specialized technique for removing minor dents and dings from a vehicle’s body without traditional bodywork, sanding, or repainting. It relies on the skillful manipulation of the dent from behind the panel using specialized tools, resulting in a dent-free surface that retains the original paint finish. PDR is cost-effective and environmentally friendly, eliminating the need for harmful chemicals and reducing waste.
1. Gather the Right Tools
A successful Paintless Dent Repair (PDR) starts with assembling the appropriate tools. Your basic PDR toolkit should include dent removal rods, hooks, and wedges. These tools come in different shapes and sizes, allowing you to effectively address various types of dents.
- Dent Removal Rods: These are the workhorses of PDR. They come in various lengths and curves to reach different angles and contours on your vehicle’s body. Thin, flexible rods are excellent for accessing tight spaces, while sturdier rods provide the leverage needed for larger dents.
- Hooks and Wedges: Hooks pull and push on the dented area, while wedges help create space between the panel and the car’s body. Both are essential for gaining access to the dent from behind.
- Hot Glue Gun and Glue Sticks: These are used in the glue pulling technique, allowing you to attach plastic tabs to the dent for pulling.
- LED Inspection Light: Proper lighting is crucial for assessing the dent and monitoring your progress. A bright LED light source can reveal imperfections in the dent’s surface and assist you in achieving a flawless finish.
2. Assess the Dent
Closely examine the dent to determine its size, depth, and location. PDR is most effective for smaller dents with minimal paint damage. If the paint is chipped or cracked, consider touch-up paint as a finishing step after dent removal.
3. Choose the Right Technique
Different dents and their locations may require different PDR techniques:
- Pushing From Behind: This method involves using specialized rods to apply pressure to the backside of the dent. It is effective for dents with sufficient access from behind, such as those on fenders and door panels.
- Glue Pulling: For dents in areas with limited access, glue pulling can be highly effective. It involves attaching a plastic tab to the dent using hot glue and a pulling tool to extract the dent from the front gradually.
- Tapping or Knocking Down: After pushing out the primary part of the dent, you may need to gently tap or knock down any remaining high spots. This step helps you achieve a smooth and uniform surface.
4. Start from the Edges
When using PDR rods to work on a dent, always begin from the edges and work toward the center. This gradual approach allows you to evenly distribute the pressure evenly, minimizing the risk of creating high spots or further damaging the paint.
5. Be Patient
One of the essential attributes of a successful PDR is patience. Take your time, and work slowly and methodically. Making small, precise adjustments is key to achieving the best results. Rushing through the process can lead to over-correction or even paint damage, ultimately prolonging the repair process.
6. Use Proper Lighting
Good lighting is paramount in the PDR process. Adequate illumination allows you to detect even the slightest imperfections in the dent’s surface. Position a bright LED light source to cast a shadow over the dent. This shadowing effect highlights any remaining irregularities, helping you ensure a flawless finish.
7. Consider Auto Body Filler
While PDR is highly effective for most minor dents, some larger dents or those with significant paint damage may not be suitable candidates for this technique. In such cases, consider using auto body filler, commonly called “bondo.” Body filler can fill in dents and imperfections, providing a smooth surface ready for subsequent painting.
- Application: Apply the body filler to the cleaned and prepped surface, smoothing it evenly. Once it cures, sand it down to create a level and seamless finish.
8. Finish with Touch-Up Paint
After successfully removing the dent, consider applying touch-up paint to the repaired area. This step ensures that the repair seamlessly blends with the rest of the car’s surface, providing additional protection against rust and corrosion.
- Surface Preparation: Clean the repaired area thoroughly and ensure it’s contaminant-free. Sand the surrounding paint to promote adhesion.
- Paint Application: Apply the touch-up paint following the manufacturer’s instructions. Use thin, even coats and allow each layer to dry before applying the next. Sand and buff the area for a smooth and uniform finish.
Conclusion
Mastering the art of PDR empowers you to restore your car’s appearance and save money on costly bodywork repairs. With the right tools, techniques, and patience, you can achieve flawless dent removal that leaves your vehicle looking as good as new.
For all your automotive repair needs, including PDR tools, auto body filler, and touch-up paint, trust Eastwood. Visit their website to explore their extensive selection of automotive products, equipment, and accessories. Start your journey to perfect dent removal today and unlock the potential to keep your vehicle in impeccable condition. Your car deserves the best, and with PDR, you can confidently restore its beauty.